In today’s post, I am looking at the ROM burning process for custom ROMs, for the HKA mod, mounted inside the TR-626. TR-626 kits by Harry can be found here (link) and information about creating the custom sound ROMs can be found from r-massive.com here (link).
My preferred way of using the TR-626 is through an Expert Sleepers Usamo. It keeps the timing really tight over Logic Pro. When using the TR-707, I run it through an E-RM multiclock so that I can take advantage of the on board grooves settings by triggering complete songs 1 to 4 in Logic Pro. This initially was a little bit of a nightmare until I wrot e the Raymond 7 which has just opened a lot of creative doors by making the sequencer a lot more accessible. I eventually plan to look at something similar for the TR-626 but it’s a huge job, undocumented and don’t have the will at the moment.
Anyhow, lets get to the ROM burning.
XGecu Pro T48
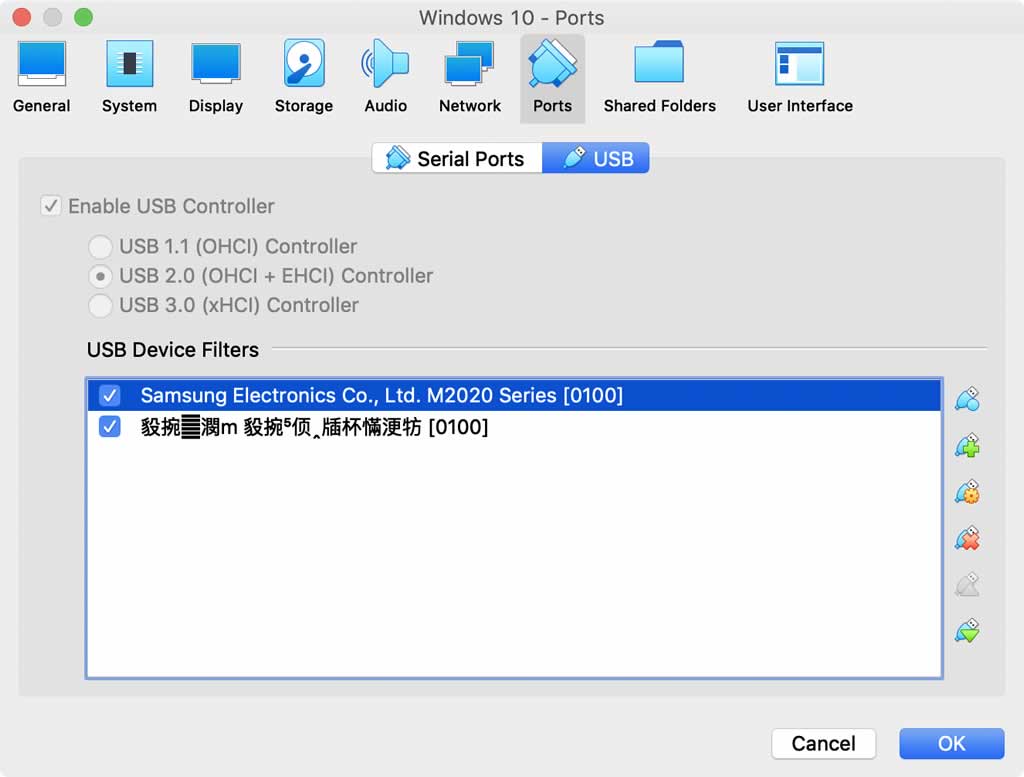
I use the XGecu Pro T48 programmer on a Macbook Pro 2019 through VirtualBox running Windows 10. I bought it on sale from AliExpress for about £35 and it has been a fantastic purchase. It was a bit of a pain to configure at first because you have to set the correct port speeds within VirtualBox. It’s not overly complicated, just one of those things you need to be aware of. By default, my port speed eas set to USB 1.1 but burning has been fine on the USB 2.0 setting. My VirtualBox port setup looks like this:
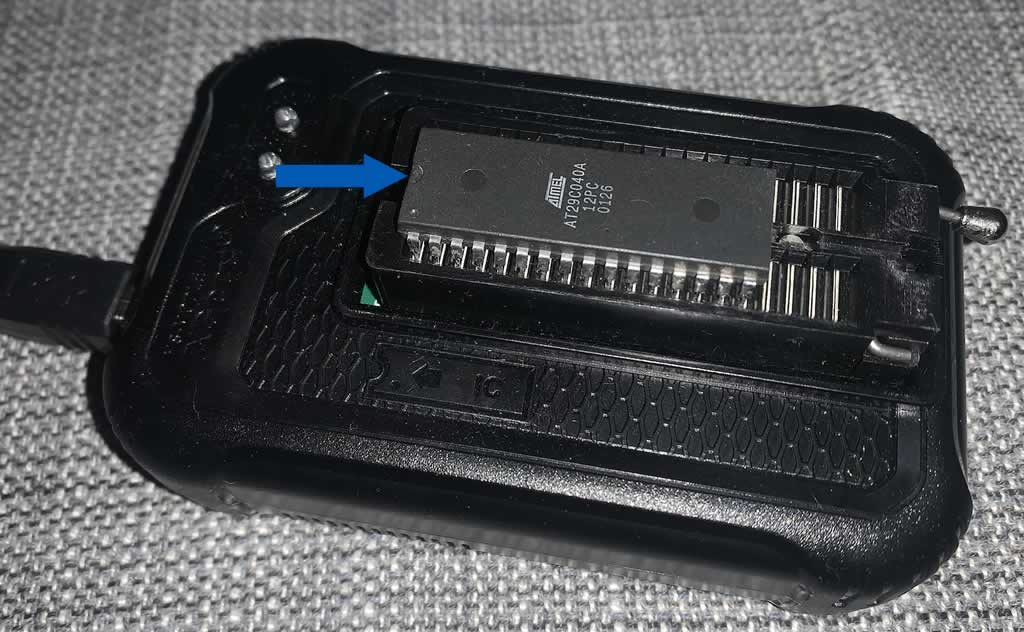
The ROM type to write to will be a 29C040 chip or compatible. I ordered a pack of 5 from a well known, overseas store.
- AT29C040A-12PC AT29C040A AT29C040 DIP 32 29C040 5PCS AT29C040A-12PI for £6.69 using this link (link removed – find out later on in the blog!)
Yes, it is a Flash memory chip. Specifically, the Atmel / Microchip AT29C040A is a 4-Megabit (512K x 8) 5-volt parallel NOR Flash memory which is a real win because it makes erasing and writing a breeze.
Burning
Open the leaver, place the chip into the socket and pay attention to the notch. With all pins in correctly, pull the lever down to secure the chip in place. You are now now ready to get started with the XGPro software.
If you already own a couple of Rolands (and possibly other vintage gear), a number of ROMs prepackaged can be found from r-massive.com here (link) by clicking on t he link called ‘Roland TR-626 Sound ROM Creation Tools v0.15’ and drilling down into the Google Drive, clicking on the ROMs folder.
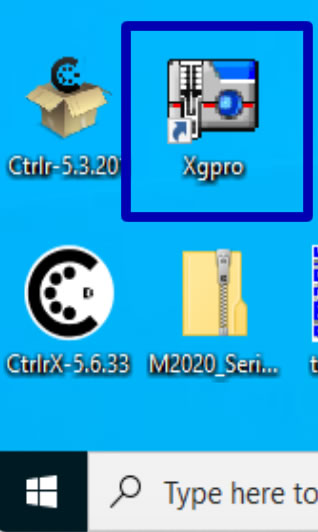
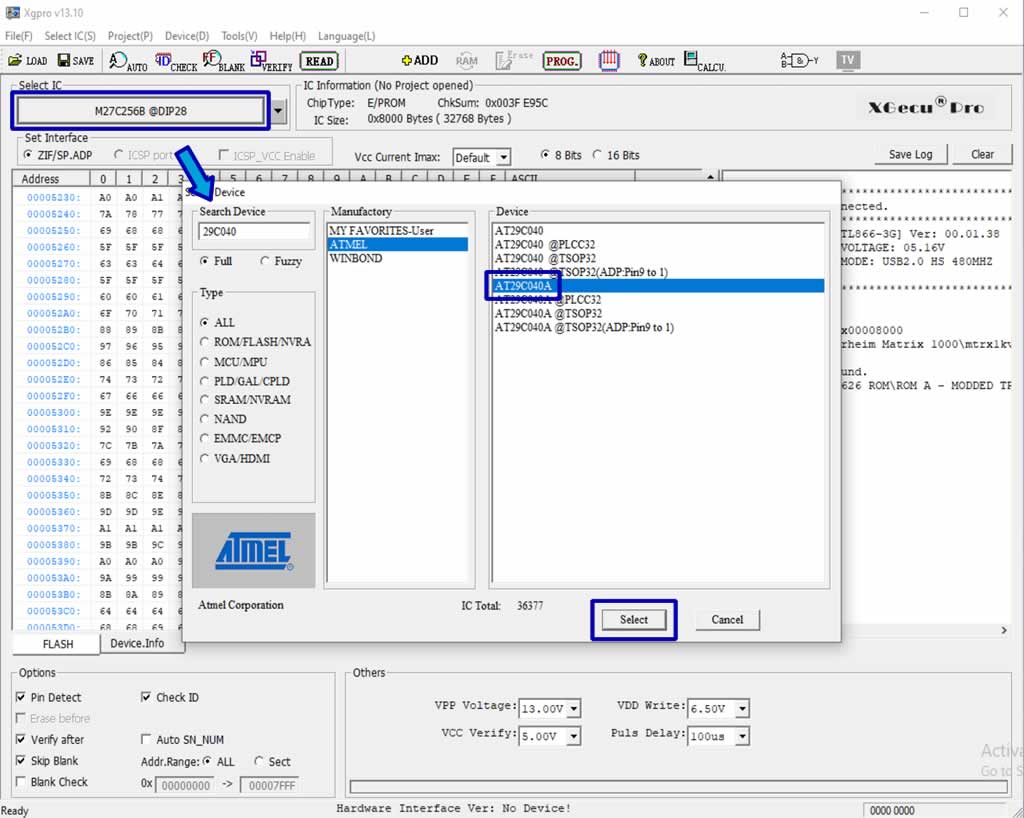
In XGPro, I clicked the Select IC button and in the new window that pops up, typed in 29C040 in the ‘Search Device’ section. Following that, I selected the make of the chip I am using and the version. In my case, a 29C040A. I then clicked on Select.
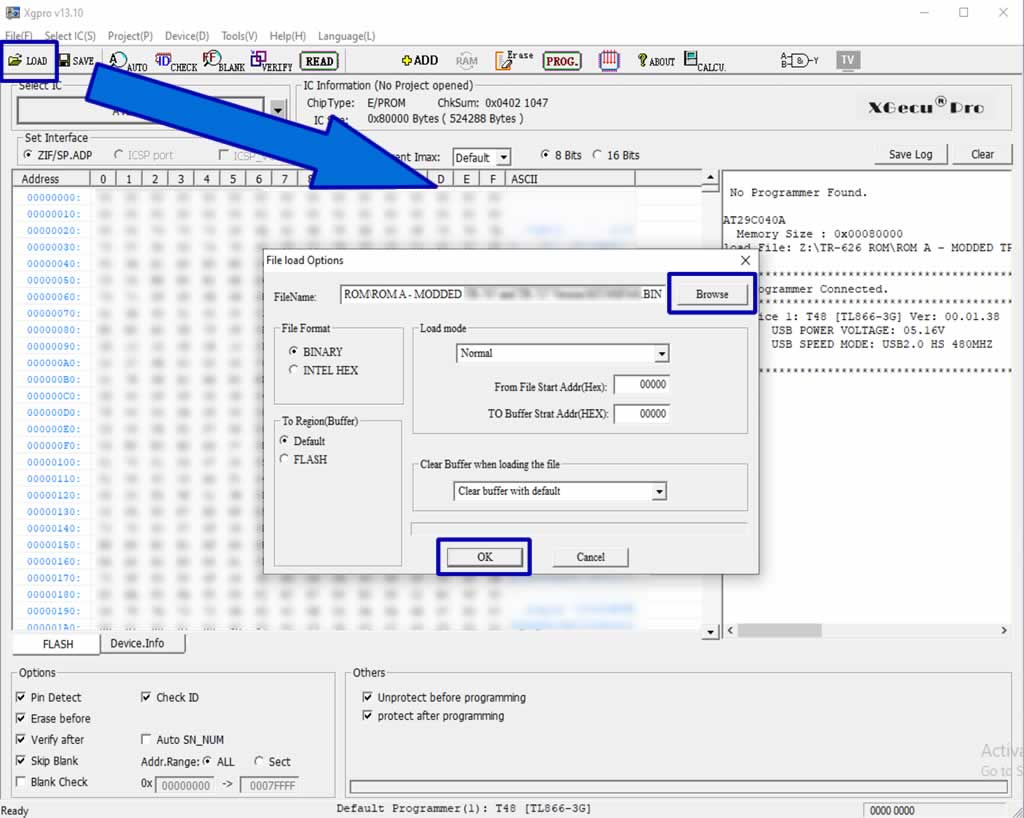
then load a ROM by clicking on the [LOAD] button, selecting ‘Browse’, finding the file and then clicking [OK].
Before writing, I performed a blank check and wow – new one on me – a pin failed to be picked up.
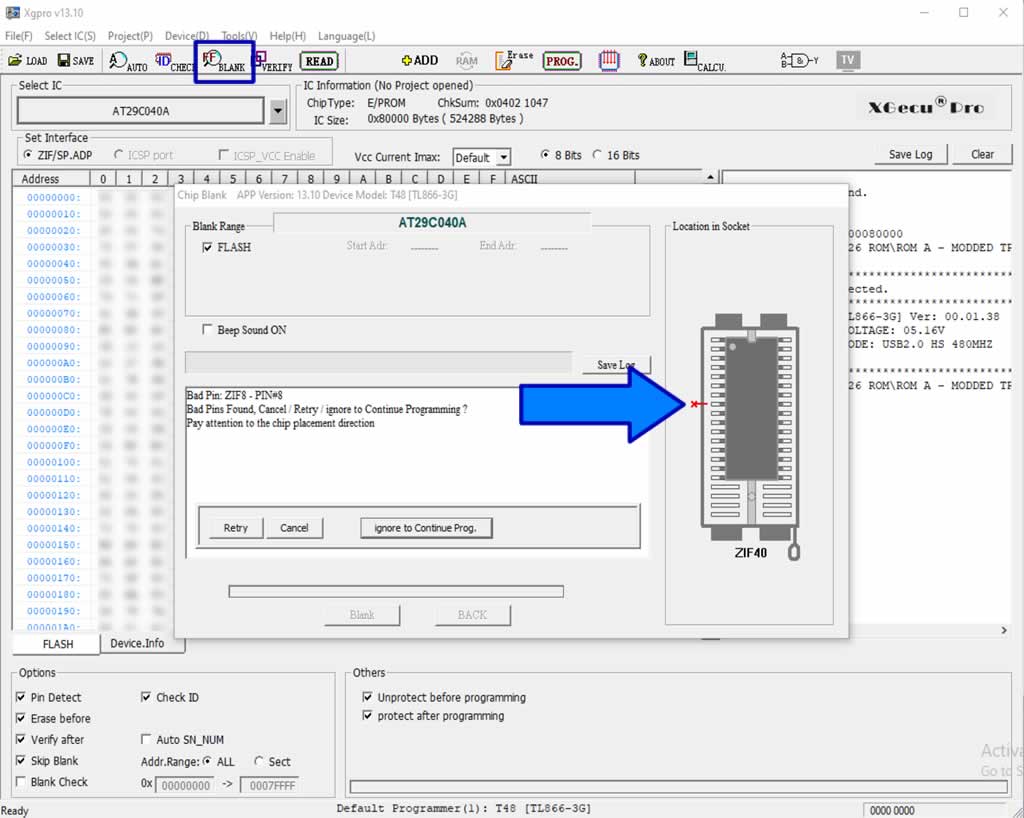
A quick Google mentioned this was a common problem and meant it either needed re-seating or is maybe a little tarnished and needs cleaning. It also recommended rubbing with a pencil eraser or a bit of isopropyl alcohol.
After a quick inspection – woah! Dirty chip! I assumed all was good because it came out fresh from the packet. That was a bit of a shock. Thankfully, a wipe with isopropyl alcohol and they looked as good as new and more importantly, I now understand why the blank check is so useful. I have performed this countless times and everything previously has passed so almost skipped it this time round. Really pleased I didn’t. While they looked good, I continued to have a few problems.
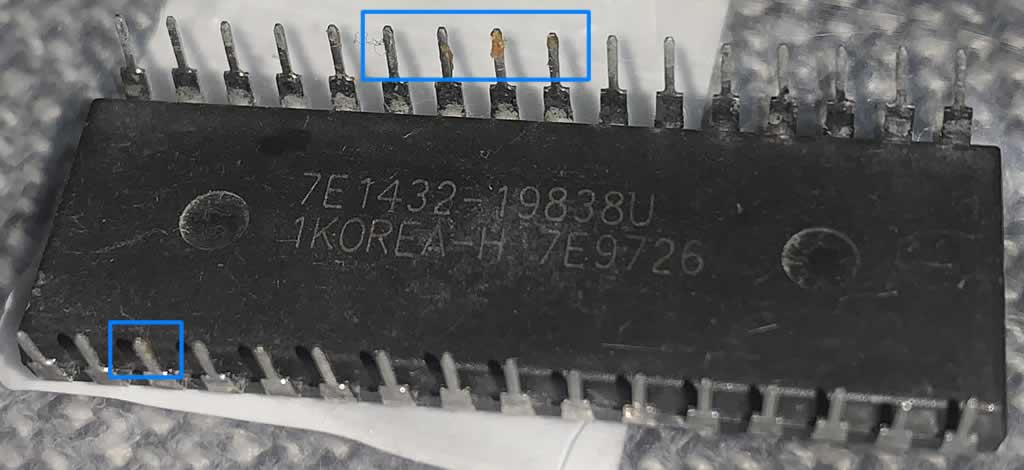
Sigh, I tried three other chips and also dirty. I will need to properly clean them. However, to get moving, I found one clean of the five and loaded it in. This time, it failed due to being full of data. Luckily, they are erasable and so used the erase function in XGPro.
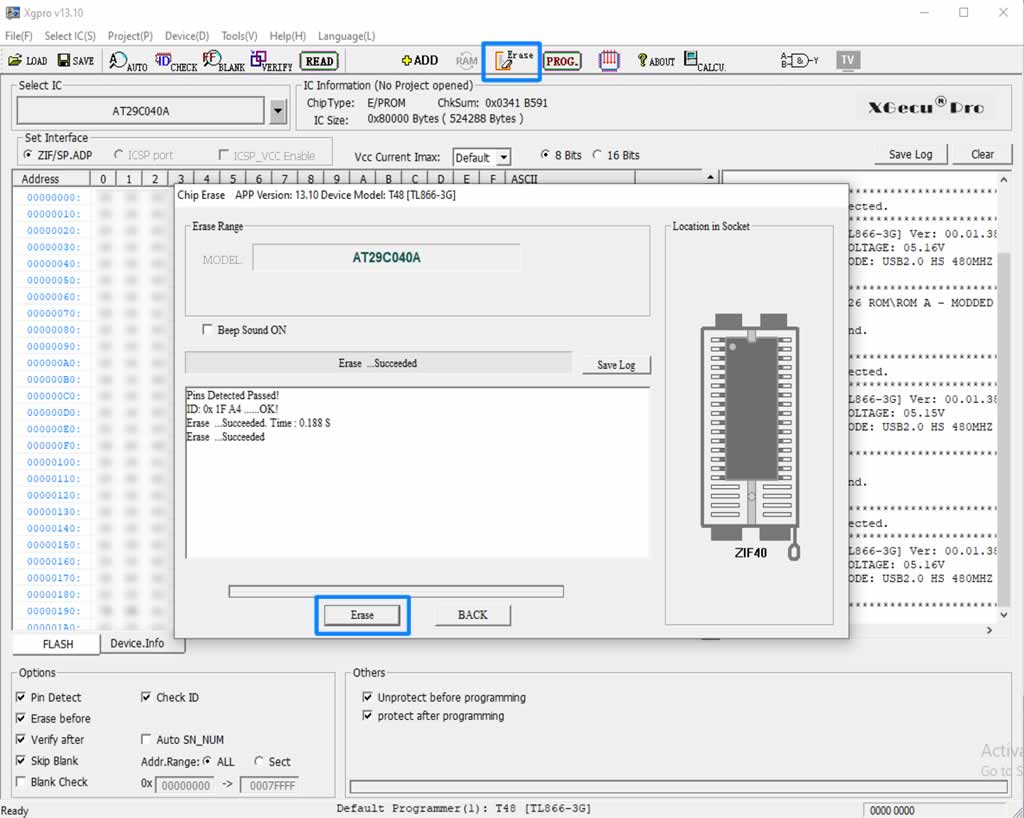
A further blank check confirmed I am good to go. Due to it being full of data, I suspect this was a used pull and therefore, removed the link at the top of the blog and will buy from elsewhere in the future.
Okay, so good to go so lets start the programming. In this case, click PROG, then ‘Program’ and wait until the main bar confirms ‘Programming …Succeeded’.
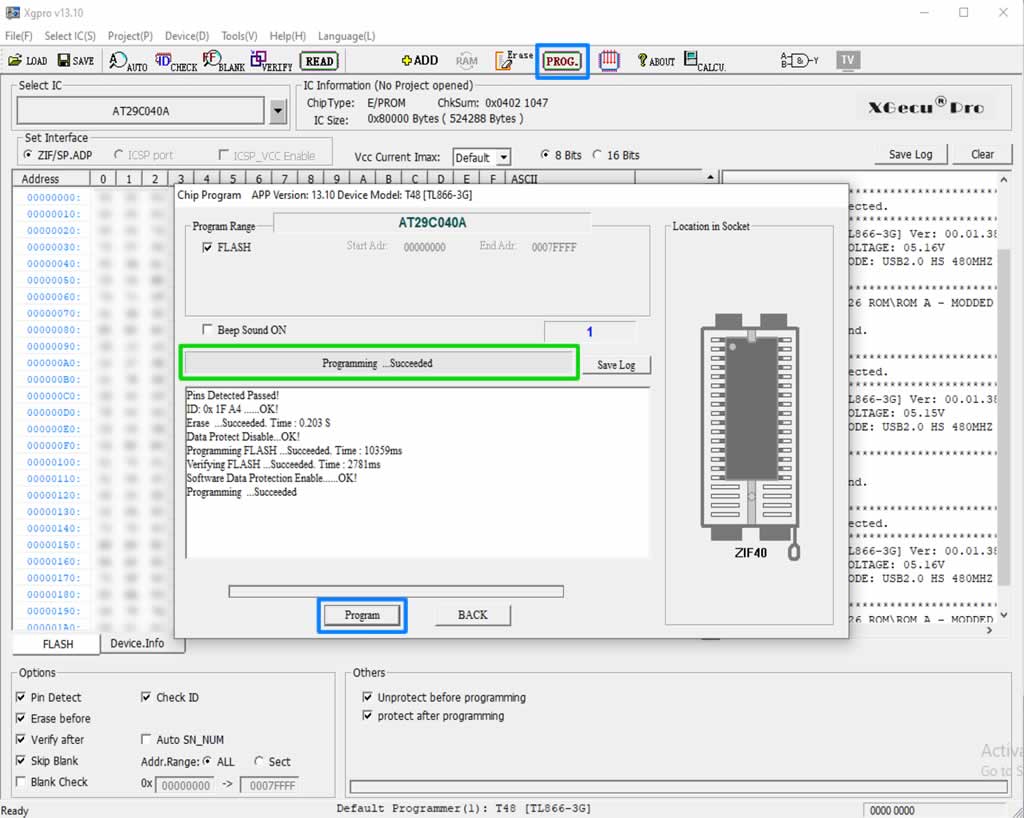
Phew and what a faff!. Okay, I’m going to clean my dirty chips! Hopefully at least four out of the five will come good and in the future, I think I’ll stick with Mouser, DigiKey or CPC/Farnell for these parts in the future. Well, to be honest, I guess that depends on price and how the other chips work out. I’m not actually fussed about pulls, chips can live a long time but they must work.
Update
Okay, so not bad. They cleaned up nicely and I suspect they were originals. I did not realise they were EOL. In this case, I think they are genuine and prefer a genuine part anyway since it will behave as expected. One chip did not work, even after a clean up but after pending the pins in to the socket, snapped into place and work fine. I’m still not providing the link though because I do not believe they are new and sadly, they are advertised as such. That doesn’t worry me but I can’t with good conscience I can recommend those particular chips because of that. Personally though, I’m happy.